
I’m going to share something not many garden bloggers share. We all show you the best of our gardens. We help you solve problems by sharing our experiences and knowledge. I’m going to turn the tables and share one of my problems with you. It’s not exactly a problem but more like an ongoing quest to improve the quality of the food I grow. It’s time to talk about soil tests and I’m going to share the details of my recent soil test. More importantly, I’m going to share the journey of following the lab’s recommendations which should, hopefully, show improvements on my next soil test.
This will be a fun experiment because I’m going to discard what I’ve been doing as far as fertilizing and amending my garden beds and try something completely new. To be honest, I’m a little nervous but I’m up for a little adventure!

Should You Trust a Soil Lab?
My first soil test with a lab was about 4 years ago. They recommended adding a specific amount of blood meal (organic nitrogen) every month for several months. That was their only recommendation. The nitrogen level was extremely low but everything else was great. However, their recommendation resulted in way too much nitrogen and it took me a few years to fix that problem! Thankfully, I also have a community garden bed so I was able to grow root veggies there while I fixed the excessive nitrogen in my home gardens. Too much nitrogen for root crops equals beautiful top growth but puny roots.
Around the same time, our local cooperative extension built a 5-acre botanical garden. They took a soil sample and sent it to 2 different labs. Those labs came back with different results and it wasn’t just minor differences. Each lab received half of the soil sample they collected and yet the results didn’t match. This led the extension to do other experiments and research. They finally came to the conclusion that you should pick a lab and stick with it year after year. Switching labs will skew the results that show how the soil is changing. You’ll lose your starting point reference.
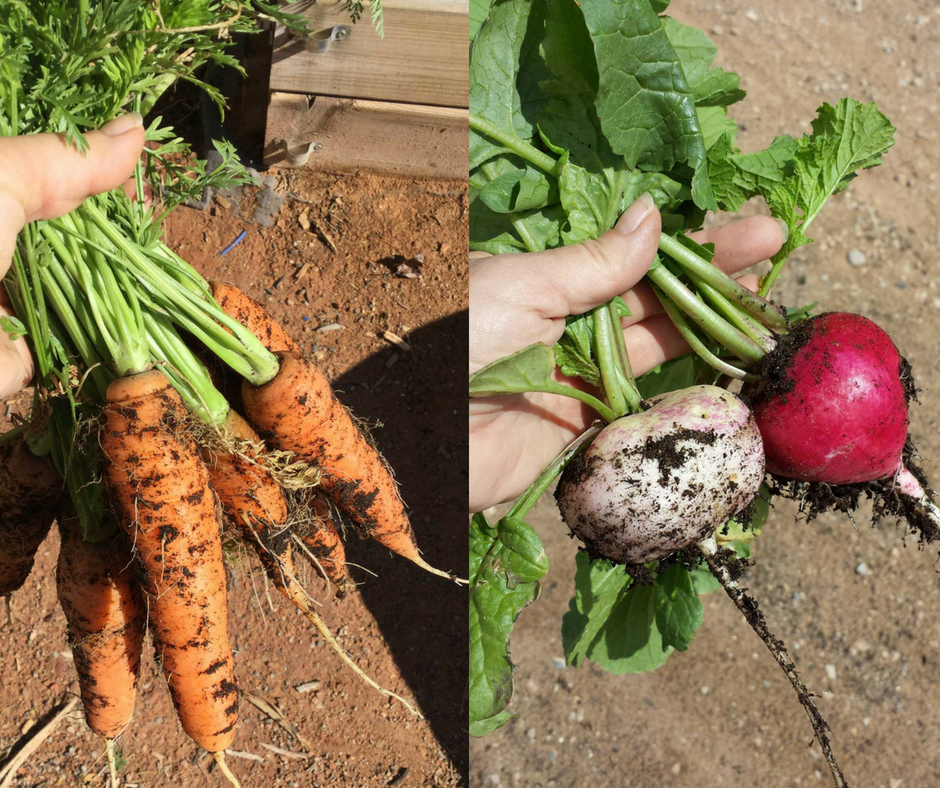
I can finally grow root veggies in my home gardens!
My Next Soil Lab Choice
However, based on my experience with that first lab, I was not going to use them again! Instead, I tried International Ag Labs based on a glowing recommendation from a gardening buddy of mine who also focuses on growing nutrient dense food.
This is my second time using International Ag Labs. The first time was two years ago but I didn’t follow any of their recommendations. They recommended many specific products that only they sell, and they didn’t have any information on their website about these products. I had a hard time getting that information in printed or electronic form. However, this lab comes highly recommended by many growers that focus on growing nutrient dense food. I gave them one more try with a promise to myself that I WILL follow their recommendations even if I can’t get detailed information about the products. I will trust the glowing reviews others give them.

Do-It-Yourself Soil Test Recommendations
Yes, it’s possible to learn how to interpret soil test results myself and maybe some day I will but for now I don’t have the time to go down that road. If you’re interested in taking a deep dive into soil nutrition, I highly recommended the books The Intelligent Gardener: Growing Nutrient Dense Food, Teaming with Nutrients: The Organic Gardener’s Guide to Optimizing Plant Nutrition, and Teaming with Microbes: The Organic Gardener’s Guide to the Soil Food Web. I’ve read all of them several times and I gain so much each time but, for this stage of my life, I like to have a lab’s recommendation to follow. After my first experience with a soil test (ending in excessive nitrogen), I’ve learned to look closely at the recommendations AND the results I see in the garden. The plants tell us so much if we just slow down and watch them.
My Soil Test Results
And the details…
- Nitrates, copper, iron, and zinc are very high
- Sodium is very high even after flushing out my beds before sending in the sample.
- Potassium and phosphorous are very high. Goal ratio is 1 (P):1 (K) and I’m at 1.35:1.
- Calcium is a bit low but magnesium is right on target. Goal ratio is 7 (Ca):1 (Mg) and I’m at 6.85:1.
- Manganese is low
Here’s what I’ll be using this year starting with my first warm season planting in mid-February. I’m not giving measurements as this is specific to my garden.
Broadcast Amendments used before planting
• Carbonized limestone
• Geo-Cal
• ReMin (a mix of five rock dusts)
• Gypsum
• Eden
• Manganese Sulfate
Monthly Fertilizer Recommendations
• Cal/Mag Plus or Inferno (alternate monthly)
• Z Hume
Most of these products that are specific to International Ag Labs. This year’s attempt to get more information was more successful and I’m happy with what I’ve learned. I really wish they’d update their website or somehow have product information available but, I was able to chat with their distributor for home gardeners for an hour and he was very thorough in answering all my questions.

Lifetime 80gal Compost Tumbler – Screened compost with unfinished bark tossed back in.
No Compost?!
Another recommendation they made was to avoid adding compost to the garden. My first soil test about 4 years ago revealed insanely high organic matter which was the result of using imported soil to build my raised beds. We have a lot of caliche which makes in-ground gardens extremely difficult. Most people dig with jackhammers here!
Locally, our choices for bulk soils and composts are rather disappointing. I used OMRI Listed bagged soil labeled for raised beds (no need to mix with native soil) to fill my beds. My first soil test, about a year after growing, showed 60% organic matter! No, that’s not a typo.
Lesson learned…OMRI Listed may mean organic but it’s doesn’t necessarily mean quality. My current test didn’t include organic matter but I’m guessing it’s still very high. Also, many people in the nutrient dense gardening community believe that we rely too much on compost which can lack in trace minerals. I learned from the distributor that the “no compost” recommendation is because my potassium and phosphorus levels are high. Compost will only add to that imbalance.
I’ve always added a layer of 2-3” of compost in the spring. Those who grow in raised beds know that the soil sometimes needs to “topped off” even when using shredded wood chips for mulch. Compost also served that purpose of adding bulk to increase the soil depth if needed.
Without compost what do I use? According to the lab, I should use a mix of peat moss and sand to add bulk. These are recommendations made based on my soil test but others with raised beds may have similar issues.
The Experiment Begins!
I’m in a mild winter climate so with a bit of planning and frost protection I can grow food all year. Right now, I’m in the middle of a long cool season that lasts from fall until the following spring. My first warm season crop will be tomatoes planted in mid-February. My beds are filled with cool season crops now so I’ll start this new amendment and fertilizer routine when I change over my beds to warm season crops.
Related post – Get an Early Start on Tomato Season
I’m hoping to see an increase in plant health which naturally leads to a decrease in pest and disease issues. I’ll also be monitoring the nutrient density using my Brix meter. I’ve kept logs of measurements over the years so I’ve been able to see the quality of my produce continually increase year after year. I expect it to increase even more by using a soil lab that focuses on growing nutrient dense food.
Have you ever had your soil tested by a lab? What was your experience?
Related Posts
Garden Planner: Plan Your Garden for Success
[…] Growing Nutrient Dense Food – My Soil Test […]